
This article is applicable to all Zmanda products.
Introduction:
Zmanda's ticket system provides users with a convenient method for sending messages to the Zmanda Support Team with attachments up to 100 MB. This can be done either via reply email or by updating through the support portal. However, for larger files or unsupported formats, we provide a customer-facing SFTP (Secure File Transfer Protocol) server. To upload files, users need to log in using the SFTP server credentials. Please reach out to the Zmanda Support team to obtain these credentials.
In this article, we'll explore two methods for submitting files based on their size and format. For files smaller than 100MB, we'll walk you through the process of creating a case on NZ and attaching your files. Alternatively, for larger files or unsupported formats, we'll guide you through an SFTP transfer.
For Files Smaller than 100MB via Network Zmanda:
Steps:
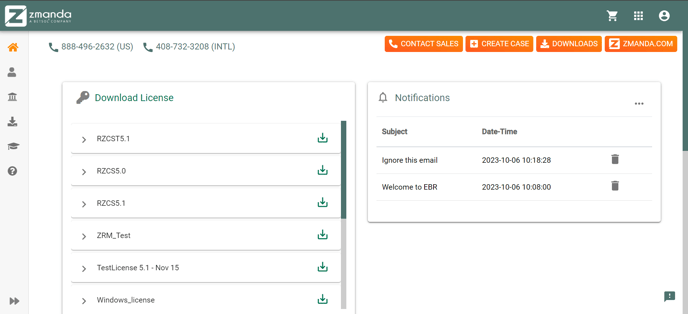
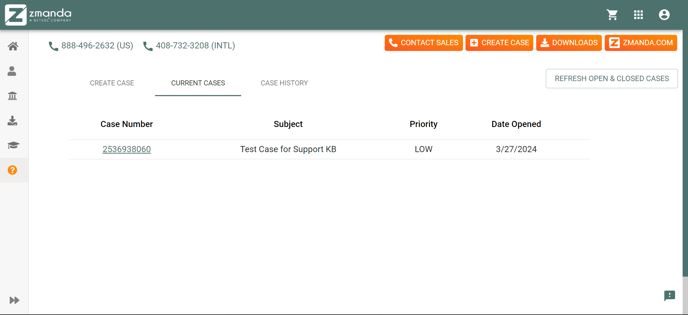
1. Login to Network Zmanda:
-
-
Open your preferred web browser and navigate to network.zmanda.com
-
Enter your credentials to log in.
-
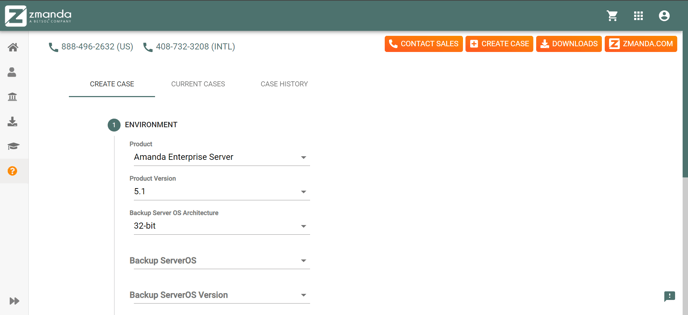
2. Create a Case:
-
-
Click on the Create Case option located at the top right corner of the screen.
-
3. Provide Environment Details:
-
-
Under the Create Case tab, select the appropriate options from the dropdown menus to provide details about your environment.
-
Click Next to proceed.
-
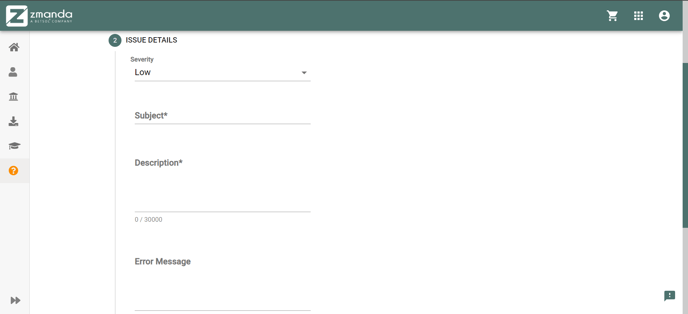
4. Provide Issue Details:
-
-
Enter the subject and description of the issue you're experiencing.
-
Fill in any other optional fields as necessary.
-
Click Next to continue.
-
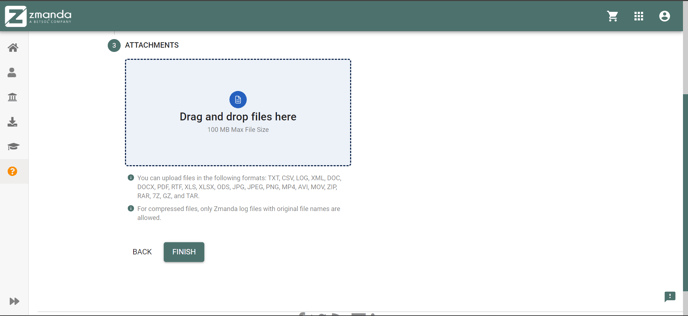
5. Upload Attachments:
-
-
Upload your files by either selecting them or dragging and dropping them into the designated area.
-
Ensure that your files adhere to the following formats: TXT, CSV, LOG, XML, DOC, DOCX, PDF, RTF, XLS, XLSX, ODS, JPG, JPEG, PNG, MP4, AVI, MOV, ZIP, RAR, 7Z, GZ, or TAR.
-
Note that only Zmanda log files with original file names are permitted for compressed files.
-
6. Submission:
-
-
Ensure that the total size of your uploaded files does not exceed 100MB.
-
Once all files are uploaded, click Finish to complete the case registration process and send the files to the support team.
-
Additional Information:
-
If you've already created a case and need to add more files, navigate to Current Cases tab and select the appropriate case number to attach additional files.
For Larger File or Unsupported Formats via SFTP Transfer:
Usage Guidelines:
1. Update Your Support Case:
- Always include filenames when updating your support case.
- Note: The support team is not automatically alerted about SFTP uploads, and files are not automatically linked to open cases.
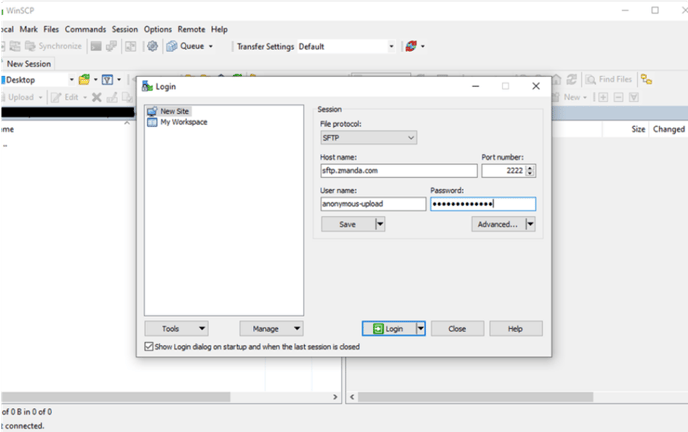
2. Connect to the SFTP Server:
- Connect to the SFTP server using an SFTP client with port 2222 (e.g., FileZilla for Windows, Mac, Linux, Cyberduck for Windows, Mac, WinSCP for Windows, etc.).

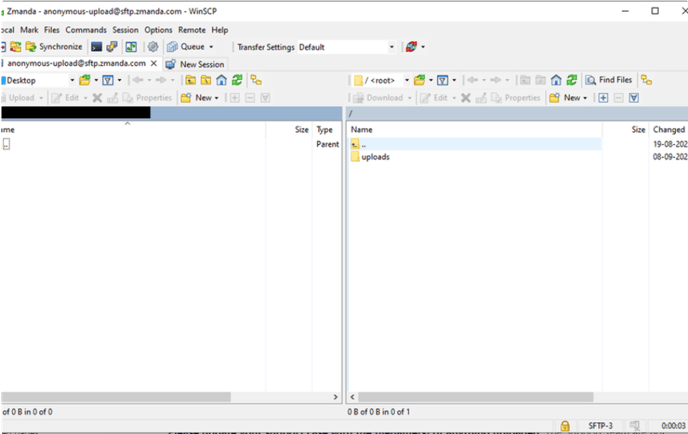
3. Navigate to the Uploads Directory:
- Use the command cd uploads to access the uploads directory.

4. Viewing Contents After Upload:
-
Even after a successful upload, please note that the contents of the upload directory cannot be listed. You will receive a notification from the support team if your file(s) do not arrive as expected.
5. Access to Uploaded Files:
- Please wait for 15 minutes after uploading to allow the support team access to your files.
6. Troubleshooting:
- In case of any issues uploading to the SFTP site, promptly update your support case or email support@zmanda.com.
By following these steps, you can efficiently send files to the Zmanda Support Team for prompt assistance.