
This KB article guides you through the step-by-step procedures for a seamless ZRM migration.
Understanding the migration process for Zmanda Recovery Manager (ZRM) across versions 3.7, 3.8, and 3.9 is essential , whether you're upgrading hardware, reconfiguring resources, or enhancing system efficiency. The article includes instructions to smoothly transition your ZRM installation between servers.
Pre-Migration Checklist for ZRM Migration
Before you begin the migration process, it is critical to ensure a smooth transfer. Here's a checklist of important steps to perform:
-
All migration steps must be executed using the 'root' user to ensure proper permissions and access.
-
The new ZRM server should have the same version of ZRM installed as the source server.
-
Install any patches that are present on the source ZRM server onto the new ZRM server to maintain consistency.
-
Before migrating, deactivate all backup schedules to prevent any interference during the migration process.
-
Ensure that no backup or restore operations are active while performing the migration.
-
Understand that the migration can involve moving both data and configurations or just configurations, depending on your choice.
Migrating Configuration from the Old ZRM Server
For a smooth transition to the new server, it's important to migrate specific configuration files and directories from the old ZRM server. Here's what you need to migrate:
-
/etc/mysql-zrm
-
/etc/zmanda/zmanda_license
-
It's essential to create a dump of your ZRM database from the old server.
Migrating Backup Data
When your backup data resides on the Zmanda Recovery Manager (ZRM) server and you wish to move it to a new location, you can follow these steps to achieve a successful migration:
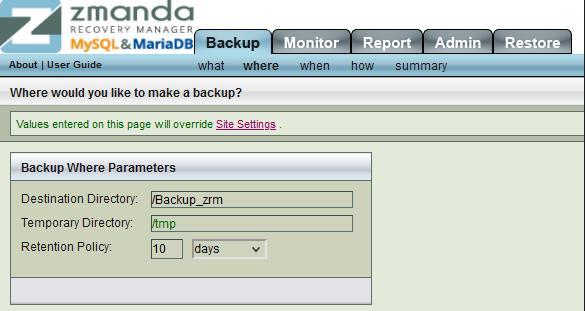
If your backups reside on the ZRM server and you aim to migrate this data, integrate the storage paths into the 'tar' command highlighted in Step 3. Access the Backup > Where page of each Backup set to identify the specific storage locations associated with your backup data.
If the backup data is migrated separately, make sure that the same storage paths are created on the new ZRM server with the same permissions. The storage directories should be owned by the 'mysql' user and 'mysql' group.
If your setup involves attached storage devices like NAS or SAN, these devices must be reattached to the new server using the same mounting paths as on the old ZRM server.
Steps for Migration:
To ensure a smooth migration of your Zmanda Recovery Manager (ZRM) data and configuration, follow these detailed steps:
Step 1. Create a new directory to temporarily store the data to be migrated.
Make sure this directory has enough free space to store the data collected during the migration. Run the following commands from this directory.
Step 2. Creating a mysqldump of the ZRM database. The mysql utilities are packaged within ZRM. Make sure the output file has an extension of '.sql'
/opt/zmanda/zrm/mysql/bin/mysqldump -uroot -p"zmcdb-admin" zmc > zrm-mysqldump.sql
Step 3. Creating a tar archive of all the configuration files
tar czpf old_config.tar.gz /etc/mysql-zrm /etc/zmanda/zmanda_license
Step 4. Copy the files to the new AE server
scp old_config.tar.gz zrm-mysqldump.sql root@new-AE:
You ensure the successful migration of ZRM data and configuration to your new server with these.
Configuring the New ZRM Server
As you transition to the new server for your Zmanda Recovery Manager (ZRM), follow these steps to set up and validate the configuration:
1. Navigate to the directory where you stored the migrated files and extract the configuration archive:
tar xzvf old_config.tar.gz -C /
/opt/zmanda/zrm/mysql/bin/mysql -uroot -p"zmcdb-admin" zmc < zrm-mysqldump.sql
3. Log in to the ZRM Console and meticulously verify that all data has been migrated accurately. This step confirms the successful transition of your configurations and settings.
4. Once the migration is validated, reactivate your backup schedules. This action ensures the resumption of your backup operations on the new server.
Post-Migration Checks and Validation
Following the migration of your Zmanda Recovery Manager (ZRM) setup, it's essential to conduct thorough post-migration checks to ensure a successful transition. Here's what you need to verify:
-
Confirm that all your Backupsets and licensing details have been accurately migrated.
-
Perform a test restore using the migrated backups to ensure that the restoration process works seamlessly.
-
Double-check that all entries on the Monitor and Report pages have been successfully migrated.
-
Keep a vigilant eye on your backup operations for a few weeks post-migration. This monitoring phase allows you to identify and address any potential issues that may arise. Once you've ensured the integrity of your migrated setup and have monitored it adequately, you can confidently decommission the old Application Environment (AE) server.
This concludes the migration process, ensuring successful ZRM operations on the new server.